


You Will Need
- 2 Contrasting Fabrics
- Elastic
- Button/Cover Button
- Sewing Machine
- Scissors
- Chalk
- Pencils/Pens
- Iron
- Pins
- Ruler

Step One
Firstly, using the fabric you have chosen for the outer of the pencil case, cut 2 x 10in x 17in pieces.

Step Two
Next, cut out a piece of the inner fabric, this is going to be the piece with the slots for your pens/pencils, this will also need to be 10in x 17in.

Step Three
Take the pocket piece and fold in half with the raw edges facing towards you and iron along this fold.

Step Four
Take one piece of the main fabric and lay the pocket piece flat at the bottom, making sure to line up the bottom edges. Once the edges are lined up, pin along the sides and bottom and then stitch on the machine.

Step Five
The next thing you need to do is mark out all the pockets for the pens/pencils. Make these 1in wide, at either end mark out two spaces which will be slightly wider at 2in wide, these would be for the larger items you may need to put into the pencil case.

Step Six
Now all the pockets are marked out, stitch along all these lines. Make sure you back stitch at the top, to make sure this part is reinforced for putting the pens in and out.

Step Seven
Next, we are going to attach the final outer piece to the pocket piece and put the elastic in place. You can use various kinds of elastic and even a small hair tie would work. Lay the right sides together of the fabric, aligning up the edges. If you are using cut elastic, make sure the elastic sits on the inside of the fabric when you pin it in so when you turn it round it will be on the right side

Step Eight
Next, turn the pencil case right side around, press the edges and stitch all the way around.

Step Eleven
Now, attach the button to the outside of the fabric. You can either use a button you already have or a covered button which matches the fabric. We have used a covered button, take a look at our handy how to cover buttons with fabric guide.
Once you have your button ready, put the pens and pencils which you are going to use into the pencil case and roll it up so you can see exactly where the button needs to be sewn onto.

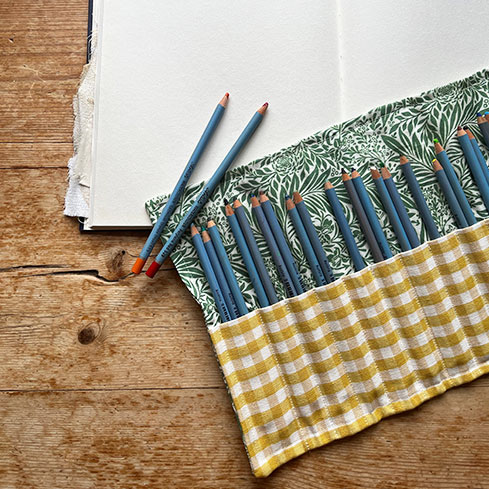
Finish
You now have your finished roll up pencil case!