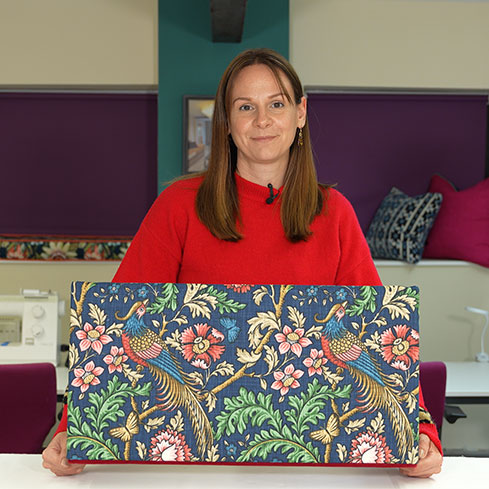
What You Will Need
- MDF Sheet
- Scissors
- Main Fabric
- Sewing Machine
- Thread
- Fabric or upholstery adhesive
- Brown Tape
- Velcro
- Steamer
- Measuring Grid
- Interlining
- Lining
- Fabric Chord
- Piping Chord
- For our pelmet, our finished size was 60cm x 30cm and the two side returns were 30cm x 15cm and we chose a 5mm thick MDF sheeting.

Step 1:
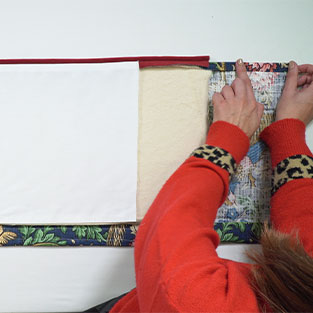
Firstly, attach your side panels to your main pelmet panel. To do this, push up your side panels to your main pelmet panel and using brown tape, secure them to each side. Smooth over the tape each time you secure it in place. Repeat this process on the other side.
Step 2:
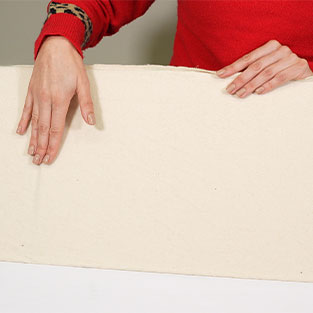
Next, cut out 2 panels of curtain interlining which will need to cover the whole of the front and back of the MDF sheeting. We cut ours to 90cm x 30cm. After you have cut out your interlining, secure it to your MDF sheeting using fabric or upholstery adhesive.

Step 3:
Once the lining is attached to the sheeting, you will need to use your main fabric to create the cover. To ensure you have no raw edge and a continuous pattern, make sure you insert a seam allowance to allow your pelmet to fold over past the joins.

Step 4:
Cut out your main fabric 126cm x 41.5cm. The drop will need to include a heading allowance where the Velcro will attach in addition to a seam allowance at the bottom where we will attach the piping.

Step 5:
Then, you need to cut out your lining and calculate how big it will need to be by ensuring it fits the main pelmet and include a 3cm seam allowance on either side, which we also allowed on our main fabric. We cut our lining 66cm x 31.5cm.

Step 6:
To add your piped edge, have a look at our handy video on how to make your own piping. Once you have your piping, cut it to the length of the main pelmet, plus your side returns and allow 1cm on either side.
Attach your piping to the main fabric first by sewing the raw edges of the piping and fabric together. Start 1cm from the end and finish 1cm from the other end to ensure you are able to tuck the piping into your side returns.
Step 7:
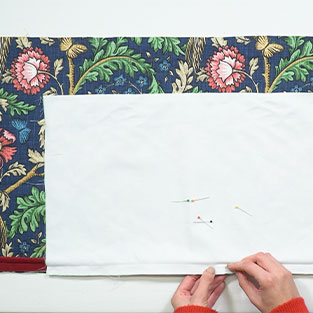
Afterwards, with the piping attached, attach the lining to your pelmet. Firstly, you will need to centralise your lining into the right position and make sure you have the same amount of fabric and piping on either side for your side returns. Pin into position and sew in place.

Step 8:
Now it is time to turn in your heading. With the fabric facing the wrong way up, turn your fabric up 9cm, pin and press in place. Once it is turned in, position your pelmet board into the right place on your pelmet cover and pull the lining back.
Step 9:
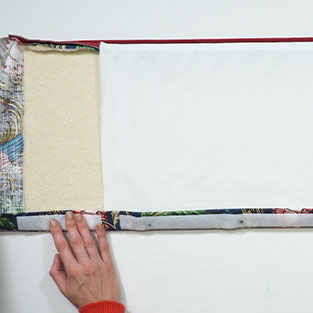
Next, you will need 3 pieces of Velcro to sit on your main pelmet as well as the two side returns to attach to your heading. Use the loop Velcro as the hook Velcro will be on your pelmet shelf. The longer piece needs to be shorter than your lining, we cut ours to 58cm, allowing the Velcro to avoid the joins on your side returns.

Step 10:
Position the middle piece of Velcro and turn the heading over and the board up slightly so you can see where the join is. Once in place, pin the Velcro to your fabric and make sure it doesn’t attach to your lining. Repeat this process for your two smaller pieces of Velcro which will sit on either side.
Make sure you do not start over the join and line up the top edges of your Velcro. Remove your pelmet board and sew your Velcro in place.

Step 11:
With the board positioned in the correct place, fold the lining up and this should reach the top of the pelmet board. Tuck in the piping in, fold over your side return and pin in place. Repeat this process on either side.
Step 12:
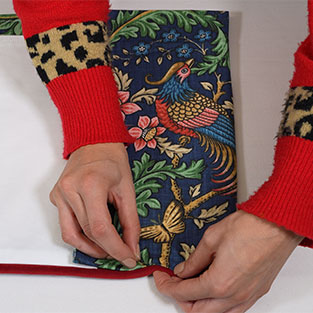
Now, with the bottom edge secure with the pin, turn in the raw edge, running up along the join and pin in place. For the bottom edges, use a ladder stitch and hand stitch in place. Repeat on the other side.
Step 14:
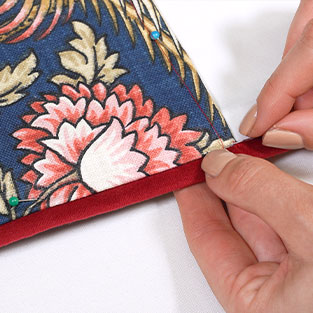
Next hand stitch up the side returns using a ladder stitch, making sure you colour match your thread. Tuck in any thread tails from the bottom behind your main fabric. Repeat this for both of the side returns.
Step 15:
Finally, hand stitch your heading and use a ladder stitch to secure the ends. Pin your heading in place and use a slip stitch from the start and finish with the ladder stitch.


